Dreaming of Travel – My Next Road Trip

IMG_4218
The Beautiful Northern California Coast

You may not think so, but for a while, I had actually traveled so much, that I was becoming sick of travel.  Yes, me – sick of travel.  We’d always be jetting away, and I would focus on the things to do back home as our apartment remained unclean and just got dustier and dustier.

Not surprisingly, with nothing more than an occasional trip to the grocery store in the past month (and probably at least for the next six weeks) – travel is the only thing I can think about (such a shift!).  That said, I’ve started even planning future trips for when we can finally leave the apartment.  In this post, I’ll describe my ideal trip across the Northern California coast and mountains.

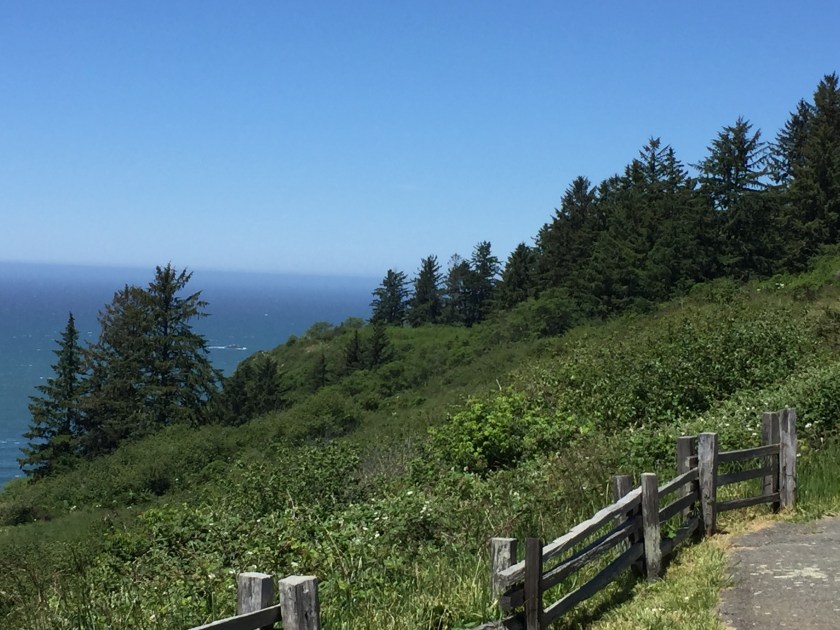
Day 1: Driving up the coast from the Bay Area (stay in Jenner, CA)

For day one, I’m going to skip the places that are closest to the Bay Area where I could easily visit on a day trip.  Because of this, I think the end point for my first day would be the Timber Cove Lodge (past Bodega Bay).  I love Design Hotels and the love a room with views of the California coast.  It seems like the perfect start to a long road trip.

Day 2: Driving from Jenner to Mendocino (stay in Elk, CA)

IMG_1806
Quaint Mendocino

As we drive up Highway 1 on the California coast, we stop by Ft. Ross State Historic Park.  It’s not everyday you get to see a historic Russian fort in the continental US.  On a side note, I wish the California State Park system had a passport program that was similar to the National Park Service’s.  It’s a great way to keep track of where and when you visit a park.  Plus, I’m pretty geeky and think the stamps are cool.

Once we get toward Mendocino, I think I’d like to stay at Harbor House Inn in Elk, CA (a little bit south of Mendocino).  I found out about it in the New York Times 36 Hours post on Mendocino, and it looks exquisite.  We’d probably have to eat at their nice restaurant too and try their eight to twelve course menu.

During the day, we’d obviously make the drive to Mendocino itself and walk around the cute village.  Ideally, we’d also visit Point Cabrillo Lighthouse.  If we can’t fit it all in on day two, we’ll cover the lighthouse the next day.

Day 3: The Lost Coast and Humboldt Redwoods (stay in Eureka, CA)

On day three, we’d start the trek up to coast to the land of the giant redwoods.  Time permitting, we’d stop first in Shelter Cove to get a glimpse of the Lost Coast, the area deemed impassible for highways.  On our way back, we’d travel again (we did it in 2018) through the Avenue of the Giants at Humboldt Redwoods State Park.  We’d end our long nature journey that day in Eureka, perhaps with a visit to Ft. Humboldt State Historic Park.

Day 4: Redwoods National and State Parks (stay in Eureka, CA)

IMG_4311
We are Just Dwarfed by these Trees

We’ve been to Redwoods National and State Parks before, but I can tell you it’s totally worth it to visit again.  Here, you are really remote.  We visited on Memorial Day weekend once, and even then it still wasn’t that crowded.  I planned the original trip with so much excitement.  I even bought my first National Geographic hiking map (which I’ve got to say, is unbelievably detailed – it’s like one of those maps you’d see in an idealistic Instagram hiking adventure post).  We could easily spend a day (or two) driving and hiking through this majestic park.  In fact, visiting the park is probably worth its own blogpost.

Day 5: Shasta (stay in Redding, CA)

IMG_5486
Towering Mt. Shasta

Upon visiting the Redwoods National and State Parks all the way up through Crescent City on the border with Oregon, we’d drive back inland towards Redding and then up to catch a glimpse of Mt. Shasta.  I’ve seen it both from the air and from the ground, and this prominent volcano is a sight to behold.  It rises above the landscape like nothing else, visible for so many miles.  It is undoubtedly worth a look.  I probably wouldn’t stop too much in the nearby towns though.  I’ve heard that Shasta is a haven for hippies.  Definitely not my cup of tea.

Day 6: Lava Beds National Monument (stay in Redding, CA)

The drive through Lava Beds would be through one of the remotest (if not the remotest) parts of California.  I’m not going to lie, after COVID, I might rethink seeing bats in a cave (or wear protective gear), but I’m still fascinated by the site.  The first stop on the drive though would be Klamath Basin National Wildlife Refuge (better bring my Blue Goose Passport – yes I am that nerdy).  With this location, I definitely can’t forget my camera and binoculars.  It’s supposed to be one of the most impressive bird sighting locations in the entire country.  Millions upon millions of birds migrate through here each year.

After the Klamath Basin, we’d drive to Lava Beds National Monument to take a tour of the caves and also go on some hiking.  This would be a long, but quite fun day.

Day 7: Lassen Volcanic National Park (stay in Redding, CA)

IMG_5565
Lassen Peak behind an Alpine Meadow

The final stretch would bring us back a little closer to the Bay Area with a visit to Lassen Volcanic National Park.  I’ve been here before, but it’s a fascinating place.  Driving through the devastated area or the high mountain fields, I have seen no other place like it.  We’d even take a walk near the sulfur vents that smell of farts.  If we are lucky, we would even get the chance to partake in a stargazing party at night.  Lassen is one of the few places left in the country that is truly dark at night.  Then, at the end of the day, we’d have one final stay before driving back to the Bay Area the next day.

So that’s my trip.  I’ve listed a few other options to include below, which could add considerable time to the trip.  Nevertheless, they all look interesting to me, and I would love to see them.  Writing this post now, I see this is a seven day trip.  It could happen all at once, but to be honest, I’d probably have to break it up into two or three long weekends though.  Maybe it’s not as fun as one long trip, but it’s certainly still doable.

Have I missed any important or hidden sights?  Let me know if the comments below.

IMG_4306
One More Pic of the Redwoods – Yeah, They’re that Impressive

Other notes:

Day 2: Point Arena Lighthouse

Day 4: Battery Point Lighthouse in Crescent City, CA, Samoa Dunes Recreation Area, Patrick’s Point State Park, Humboldt Lagoons State Park

Day 5: Castle Crags State Park, Shasta State Historic Park, and Weaverville

Day 6: Tule Lake National Wildlife Refuge, Modoc National Wildlife Refuge

Day 7: William B. Ide Adobe State Historic Park, McArthur-Burney Falls Memorial State Park, Ahjumawi Lava Springs State Park

Tips – Finding Cheap Flights – Part I

So you want to go on a trip?  You travel a decent amount and know a thing or two about it, but you don’t necessarily have a million frequency flyer miles to use, and you don’t have the time to keep track of 30 different airline credit cards with all of their points.  You’re not broke, but you want a decent deal – and you don’t want to spend hours and hours finding the best flights and deals.  Welcome to the majority of recreational travelers! 

There are plenty of tools out there for finding great flight and hotel offers, but they’re spread in many different places, and some of their most beneficial features can sometimes be hidden.  In this post, and in the next few posts, I’m going to go over some key features of different flight and hotel search tools to help you find the best bang for your buck.  With a little practice and diligence, you’ll find some amazing deals out there.

In this post, I’m going to focus on Google Flights.  It’s probably one of the most well known, versatile, and easy to use flight finding tools, but some of its features are a bit ‘under the surface’.  Instead of going through the features one by one.  I’ll discuss them by going through some different flight purchase scenarios, so you can see what features work best for each situation.  For this post, I’ll use the following four examples, one with a flexible destination and others with flexible dates:

  1. You want to go to NYC on a specific weekend and simply want to find the lowest price option.
  2. You have a three-day weekend coming up and want to know where the cheapest destination from your home airport.
  3. You want to visit Chicago but need to find the cheapest weekend to visit.
  4. You want to take a few days off in early May to visit Boston and want to easily see all your flight options in one place.

Before I begin, I’d like to point out one quick thing:  In my personal experience, the best days to search for flight deals is Tuesday – Thursday (the day to search, not the days to actually fly).  Although this is not set in stone, in my past experience, this has been the most common theme.  Now, let’s get searching!

Scenario 1: Finding the cheapest flight for a specific destination and date.

I want to go to NYC the last weekend of next month and would like to find the cheapest price.  This is the simplest of Google Flights features (and is common on many other travel sites as well).  For when you have a set destination and a set date, just simply put in your origin and destination airport.

This gives you some choices, but what are some good ways to filter and explore your options?

If you noticed, I put ‘NYC’ for the destination, instead of a specific airport.  If you’d like to narrow it down or add airports, simply click the ‘+’ sign in the box for a drop down:

To narrow down your list of airlines (since no one wants to fly United right now), simply click on the ‘Airline’ drop down and select your choice.  As you can see, there are other filters as well, such as price and number of stops, which are pretty self-explanatory.

And if you have some money to blow, you can always check Business or First class as well.

And before moving on to the next section, if you click back on the calendar dates, you can begin to see how flight prices change, with the cheapest dates showing up in green.

OK, so what are some of the more unknown features of Google flights?  Let’s dive in.

Scenario 2: Finding the cheapest flight destination for a given date.

If you remember when you first went to the Google Flights website, there were some pretty pictures of destinations if you scrolled down a little bit.

Whenever you go to the site, it usually fills in your home airport and picks some dates, giving you a list of prices for top destinations on these dates.  This leads us to our second scenario: You have a three-day weekend coming up and want to know where the cheapest destination from your home airport.  What are your options?

Once you’ve selected the dates, you can scroll down to see some of the different options and highlights for each destination, and if you remember the top of the menu, you can even filter by interests.  Clicking on these filters will display more of the image tiles that show specific destinations and prices.  That said, the ‘interests’ section is fairly broad in my opinion, and I’m honestly not sure how they choose what goes into each category (AKA: I don’t use this option). 

I’m going to show you the map, and that’s my favorite part!  Go ahead and click on the map that says ‘Explore destinations.’

Now let’s say for these dates (in this case April 29 departure and May 3 return), we want to find nonstop flights from San Jose, CA that are $350 and under round trip, and we want to see all destinations at once.  In the top left, select the ‘nonstop’ filter and click on the ‘Price’ filter and move to ‘$350’.

And voila!  You now have all of your options in front of you.  You could go to LA, NYC, or Portland, and they would all be in your price range.  Clicking on a city will then give you the actual details and flight options (no need to cover here, since it’s pretty self-explanatory from this point.

Let me give another example to show the power of this capability.  Let’s say I want to take an international trip, but I’m on a tight budget.   I really want to visit Asia, but I only have a flight budget of $750.  Where can I go from San Francisco?  I put in the flight origin, dates, and filters in the map, and in a matter of seconds, I can see a trip to Shanghai for only $612 and Beijing for less than $500!

Scenarios 3 and 4: Finding the cheapest flight dates for a specific destination

OK, so now our last two scenarios:

  • You want to visit Chicago but need to find the cheapest weekend to visit.
  • You want to take a few days off in early May to visit Boston and want to easily see all your flight options in one place.

For the first one, you can easily use the calendar that I showed in the first scenario.  Put in some random dates, and then look at the various weekends.  In this example, there’s a great deal at the beginning of May.

Now, what about the last use case, where your dates are much more flexible.  Here is where Google flights has some much more powerful, but far less used options: Flexible Dates and Price Graph.  You’ll notice these options when clicking on the calendar dates.

With flexible dates, you can see flexible departure and return dates all at once for a destination.  Here’s the view for a trip between San Francisco and Boston in late April or early May.  Don’t leave on April 30 – those flights are expensive!

You can use the arrow buttons on the right and on the top to modify the dates.

Now, the last feature to go over is the price graph.  This is pretty nifty if you want to view all the options for a 4-day trip to a particular destination.  Let’s say you want to go to Boston again, and you know you want to stay there for four days.  What are your options?  With price graph, you just select the number of days you want for your trip, and that’s it!  We can see here that May 1-5 is a good option, and then the prices spike in late May.  If you look at the bottom, you can see through to much later in the year – looks like there’s a drop in prices just before Christmas.

Conclusion

As you can see, Google Flights is an incredibly powerful tool that can help you find cheap flights, even when you’re just wanting to explore, with no particular date or destination in mind.  Here’s a quick summary:

  • You know the destination and dates -> Use the basic calendar option
  • You know the dates, but want to pick a destination -> Use the Exploration Map
  • You know the destination, but have flexible dates -> Use the Calendar, Flexible Dates, or Price Graph features.

All of this might seem like a bit much at first, but trust me, you will get the hang of it quickly.  Pretty soon, you’ll be traveling a lot more for a fraction of the price.  Now, for my next post, I’ll cover some additional resources for exploring cheap flight options.